Showing posts with label dyeing. Show all posts

09 April 2017

Dye Tins for April

As I mentioned previously, April is a time of firsts for me.  New techniques, yarns, dyeing experiments, classes etc.  My plan is to use this yarn for my initiate knit challenge.  I was /am envisioning a shawl with a deep purple as the main colour with an orange overdyed with green variegated contrast colour.  As everyone knows, the results can be different than your inner vision.  And that was the case here.  I definitely have some super happy accidents, and not what I envisioned with either case.

I headed to my LYS Pretty Skeins to pick Heidi's brain (who is the owner) for fibre types to use etc.  Also for a little show and tell and help me type talk regarding my shawl.  LOL  She is awesome and I just love her to pieces.  Always willing to help and encourage - isn't that great!  Well I told her what I wanted to do and what I needed.

I would prefer a yarn with a nylon content as I wouldn't have to worry as much about felting my yarn.  While I could dye fabric with my eyes closed, I'm no where near that proficient with yarn dyeing.  I was looking for 4 skeins in a DK weight that had 10 - 20% nylon content.

She could help with 2 skeins of a DK, but that was all she had.  Another lady just bought up all her white DK.   DRAT!!!  So - I guess I'm doing fingering then LOL  After a lot of discussion and oooh and ahhhing and loving the squishyness, I walked out with 4 skeins of white yarn; 2 each of Sandnes Garn Sisu and Sandnes Garn 100% Alpakka - yes you read that right  100% Alpaca.   As well as a Malabrigo Lace for a test knit I'm doing later this month / early next, and ArneCarlos designed Regia sock yarn.  I just LOVE LOVE LOVE those guys.  I want to be adopted or at the very least be a neighbour with drop in privileges LOL

I went with a kettledyed approach as I LOVE LOVE LOVE tonal yarns and I had 3 dyes / paints that would look perfect together.  First in was the purple, then the pink, followed up by violet paint and a pink metallic paint.  Since I don't have a separate stainless steel pot to dye in, I picked up 2 foil bake pans that I thought would work well.  I did a double boiler type of arrangement where I rested the bake tin on the pot with water that had reached a low boil in it.  It worked amazingly well. for both of them.

I'm still getting my feet wet with dyeing yarn, and I'm using the Dylon Dye packs that I picked up for fabric as the manufacturer says it works with wool. My first dyeing attempt proved that this dye can be used with yarn.  I get a bit concerned doing it this way, as everyone says you need acid to set the colours as well as heat - hence they are called acid dyes, but it still makes me think I forgot something.  Well Dylon uses salt to set the dyes.  And heat - with these particular dyes, after rinsing, you put your dyed item in your washing machine on hot water.  Ya, I'm NOT going to do that with wool . oh hellz no - my washer would look like a sheep exploded in it - no matter how many ties I put into my hank LOL.  So I use the salt it states and the amount of dye it states based on a lot of math and the weight of my dry yarn, All three times I've ended up with unused dye and no other yarn to put in to use it all up .. grrrr - adjustments and learning .. adjustments and learning.  I will use much less powder next time.  I can always add more dye if it's too light or absorbed it all up before I'm happy with the colour.

So with my makeshift double boiler, foil baking tins, wool, dyes and fabric paint I was set for my own version of mad scientist type experiments LOL

I hit major twit mode when I started the orange.  My original plan was to do orange and then overdye sections of it green.  My mind went what am I thinking, that will not give me green but various shades of browny colour with overtones of green and orange.  So while my mind was in the right place, apparently my hands didn't get the message and put all the orange dye in all over the yarn instead of half  .. I'm such a twit!  So I added the green and went heavy with it in areas that the orange hadn't hit and encouraged it to hit the yarn that much quicker.  And adding more dye a bit later to hopefully encourage it to take up more green dye.  I could tell by looking at it that this wasn't going to have as much green as I hoped or wanted, so that would make these skeins not really usable with the purple as was my intention.  That's okay.  It's a very happy accident and I did learn quite a bit!


I did learn a number of things here.  I will NEVER I repeat NEVER dye alpaca again.  As soon as I put in the water to soak it, it stunk to high heaven like a burnt animal hair.  I could NOT believe how nasty it smelled.  I couldn't believe how something so squishy and wonderful to knit and wear, could smell so awful when submerged in water.  Just plain water - nothing else in it.  While it was drying I was constantly separating out the separate yarn threads as it seemed to want to clump together.  This alpaca actually is actually superwash.  The manufacturer says it can go in the washer up to 30 Celsius. (86 Fahrenheit) that was the only reason I attempted to dye it.
From their website:
Garnet kan maskinvaskes på ullprogam, 30 grader.
The yarn can be machine-washed at ullprogam, 30 degrees. 
That was the closest I could get the translator to go and I got the basic gist of what it said.  I am going to guess that ullprogam is delicate or something along those lines
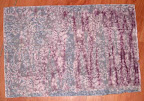
I did not get as dark of a purple as I wanted.  This picture is several shades lighter than it looks in real life.  There is a lot of pink in it, more than I thought I had put in.  It's still a very rich colour with subtle shadings of purple all the way through to pink.  This was a super nerve wracking yarn to dye and I doubt I'll do it again until I get more knowledge and experience under my belt.  I bet you 10:1 that I did something that terrifies more knowledgeable dyers LOL   Only because I don't know enough to know better.  I'm still going to use in my initiate knit challenge - just won't be using the other yarn as I had planned.  I've got 328 yards of this and that's more than enough for a small shawl /shawlette wrap type thing.
Now the orange was definitely a happy accident and I just love the autumnal colourway I got.  This started out as Sandes Garn Sisu which I have used before for heels toes in socks.  it's 80% wool 20% nylon.  I've no clue what type of wool it is - it's not alpaca though LOL  It did not smell like burnt pet hair when it got wet.  It definitely is superwash so I was much more aggressive when I was handling it when I was dyeing.  Not that I was treating it like I was doing a taffy pull, but I had no fear moving the yarn around in the bake tin and lifting bits of it up to get the dye to flow around areas more.  Not sure what this will grow up to be, but I'm not thinking socks as I want to show off what I've created - this is 383 yards - more yardage that what I've got in the Mini Alapakka version.  This could also be a shawl - a small one, but it could be one
I loved dyeing both of these even though the Mini Alapakka was giving me minor heart failures as I was terrified I was felting it LOL  I learned so much from my mistakes and from using more than one dye at a time.  I will do this again, not as soon as I would like to though.  I'm trying not to go to crazy on building a stash and am trying to knit from it - I'm doing okay on that front.  It's great that I'm doing this as when I'm ready to make a cardigan or sweater for myself, I know I will be able to dye sweaters worth of yarn 


05 April 2017

A time of Firsts ...

Knitwise, I feel like it's been a bit off the hook, insane busy. Mind you, it's all self-inflicted, but I wouldn't have it any other way LOL. When I'm busy knitwise, I'm learning and challenging myself, and that's my preferred way.  There is so much going on that I've had to write it down to make sure I don't forget something, and I feel like I am forgetting something - as always LOL

I was working diligently on my shawl, I've had to rip it back several times as in my infinite wisdom, I decided to do bed knitting and dropped a few stitches ... several times and then the hunt was on!   LOL  I get the chart details now - at least until I start the edging.  I understood the basics of reading a chart - but as always there is so much more to learn, and learn I did.  It's for the intermediate knitter (which I am) and is heavily charted.  Heavily charted took on a whole new meaning LOL  It's written okay, but not all intermediate knitters are ones that are chart readers.  Yes I love a challenge LOL

I've had to vow not to do this shawl if my eyes are a bit fuzzy or my ability to focus is not what it should be.  This pattern requires my 100% attention and sharp eyes.  With all the gorgeous lace in this shawl, if you drop a stitch it's having itself a wonderful little journey.  I got almost to the end of chart B (main body shaping) when I realized that I had some holes that didn't belong.  All I gotta say is Thank God for lifelines!!!  They have saved me a few times.  I have also discovered that sharp lace needles would be better for this project.  I have some Addi Turbo Lace Needles ordered and they are enroute.  They should be here hopefully by the end of the week.  I just might frog back the entire shawl and start again with my new needles.  I'm not sure.  The yarn I'm using is #Knitpicks Alpaca Cloud Fingering yarn and this stuff is amazing!  It is handling the abuse of being frogged back several times and maintains it's integrity.  No untwisting, no breaking, no knotting up and getting super fuzzy and unworkable.  It's 100% alapaca - I can't say enough good things about this yarn!

I've also volunteered to do two test knits for Elizabeth Ravenwood Designs and I'm super excited about these.  One is a pair of socks and the other a handkerchief / doily.  


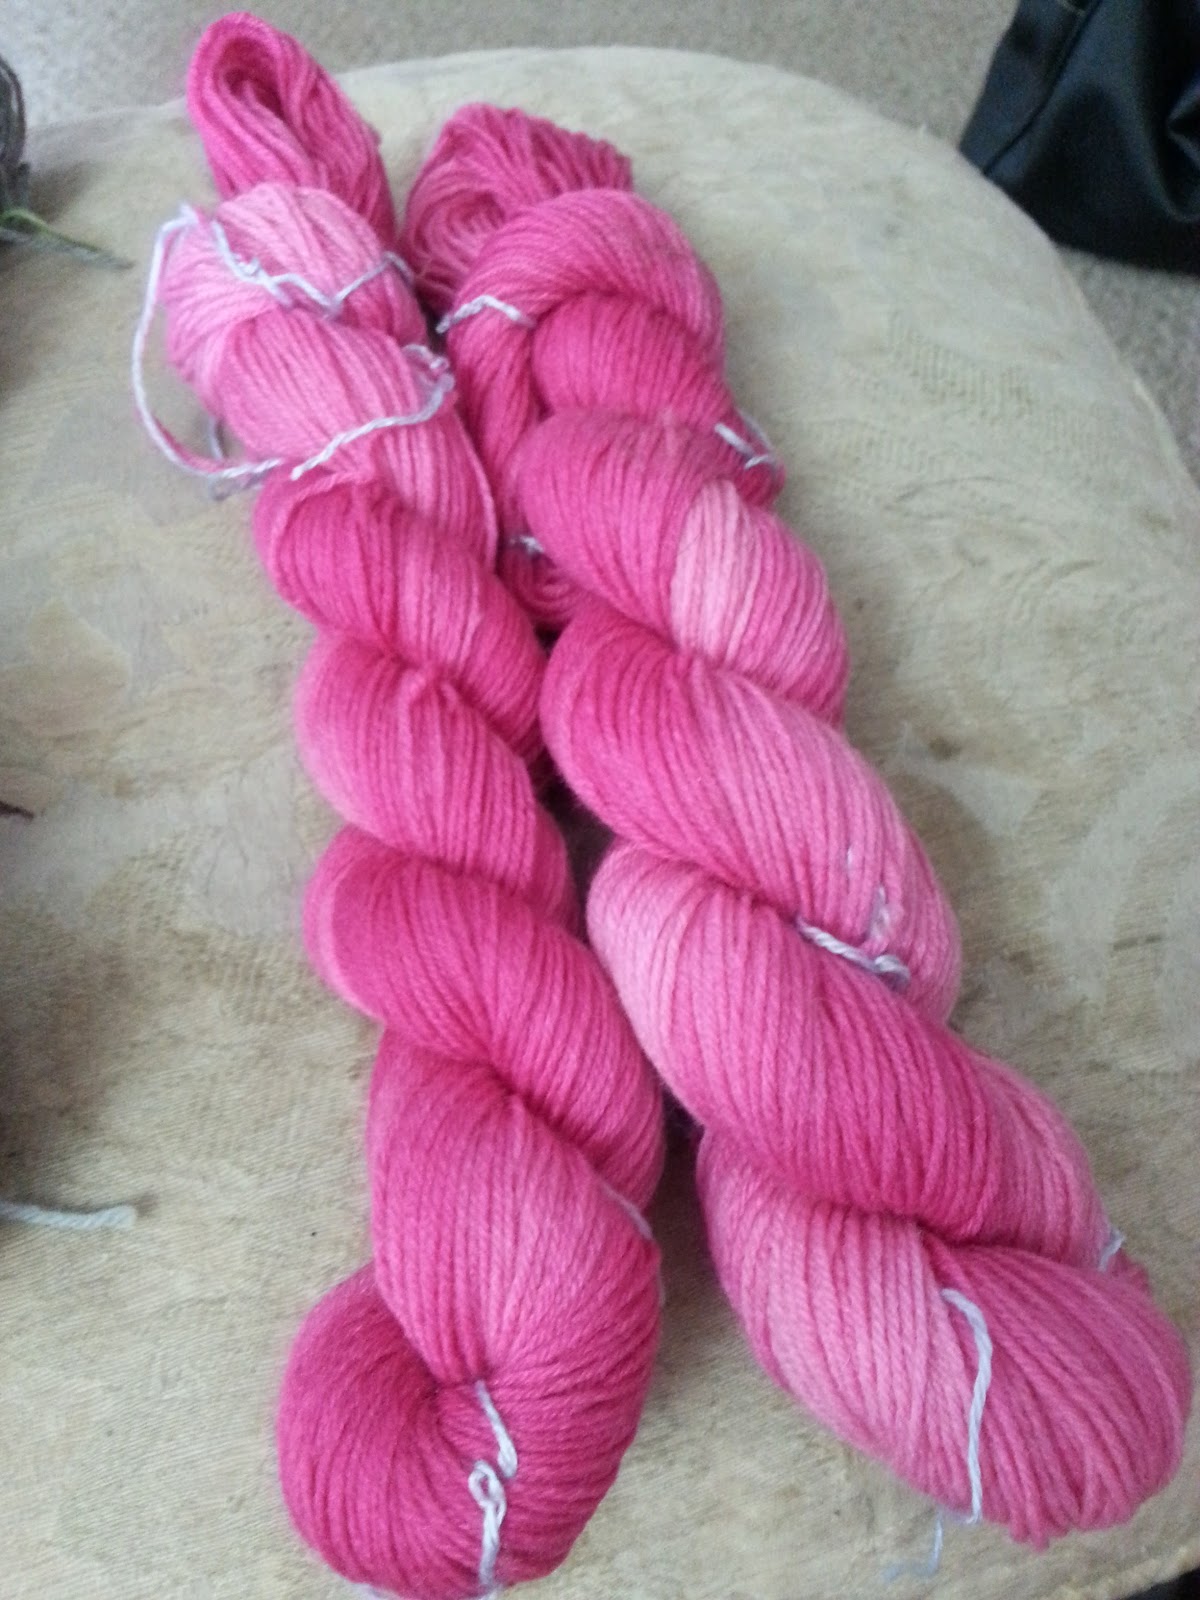
The socks have a deadline of June 30, and I should get the pattern in the next few weeks.  She wanted us to get our scraps together from previous sock / fingering weight projects and use them.  As I was looking at these bright bits from my knitting, I realized that nothing in my stash was telling me it wanted to be the main colour.  I remembered that I bought some yarn back in January I think that I wanted to try my hand at dyeing yarn.  I've dyed miles of fabric, so yarn should be a somewhat similar process.  I love to learn and I love a challenge so .. I decided to dye the fabric for the test knit :D  And I just love the result.  I wanted a tonal pink and with the content of the wool along with the fabric dye I was using reacted exactly the way I expected.  They yarn is 50% wool, ,25% rayon from Bamboo, and 25% nylon.  The nylon wouldn't take the full colour of the dye, while the wool would take 100% and I wasn't to sure about the rayon - the manufacturer said it would take the full dye, but since I hadn't used it before, I was hedging my bets LOL   


This picture here does not do the colour justice.  It's  much brighter and a deeper pink.  I'm very pleased with the way it turned out and canNOT wait to knit with it.  

I know there's a lot more to learn about dyeing yarn.  There's quite a bit of information out there on the web and youtube videos.

I love a tonal yarn, and a variegated yarn.  With this yarn I got lucky with the tonal effect as the nylon wouldn't take 100% of the dye and it would give me a tonal effect.  A wool / nylon blend is a cheat with this particular dye.  That isn't going to work very well for a yarn that is 100% wool LOL

The other test knit is for a handkerchief as I mentioned that could double as a doily.  This will be done in lace weight and I think the deadline for that is July 15.  I picked up the yarn for that already.  A gorgeous pink Malabrigo - it was the last one she had in the shop and it was on sale, Of course I got it LOL

This is going to be my first lace weight knit and my first Malabrigo.  I'm super excited about this one too!  I am also on her test knit for a cabled hat test knit for the Olympics next year :)

I've gotten back to my Stash Killer Blanket and it's now my bedtime knitting project.  That way I can knit in bed, and it will get some work done on it.  I don't make a lot of progress, but more than it just sitting in my bag in the dark, all alone - it now lives in the project tote, next to my bed  :)

I've used a bit of math to make sure that my yarn is going to be enough for the blocks.  I weighed out each block and took an average of what they needed, ,then I balled up and weighed my yarn and that way if I don't have a full skein, I know what blocks I can do with the yarn I have left.  While a good game of yarn chicken can get the blood flowing, your nerves singing and your toes curled,, it's not something I want to do for every bit of yarn and block I do.  I already saved myself time with the lighter coloured yarn I'm using now.  I would have had to rip 2 blocks and switch the order I had done them.  Glad I avoided that.  My OCD does come in handy somedays LOL

I've discovered ArneCarlos tutorials on Youtube and I'm just totally in love with these guys.  I want them to adopt me, or let me be a roommate or a neighbour.  These guys totally inspire me and motivate me - I could listen to them for hours.  I just love them.  My LYS has a bit of their Regia line and the Pairfect.  I didn't particularly care if I got the Pairfect because I'd rather have a pair of socks that doesn't exactly match, but you know they go together.  So I treated myself to a skein of their sock yarn.  My LYS isn't getting these right now so her supply was limited to 4 skeins, and I grabbed the one that the colours most appealed to me.


And with all this going on, my April socks are waiting for me to cast them on.  I'm going to use my Hawthorne kettledyed fingering yarn for these.  And these I am planning to do toe up, two at a time on 40" needles.

I was doing my socks on US 2 / 2.75mm with 64 stitches, but that's just a bit loose.  My options are to drop down a needle size or go to 60 stitches.  First I'm going to try on US 1 2.5mm needles.  I've a set of ChiaoGoo I'm itching to use

I tried to do them before with casting on my toe and then transfering them to my circulars, but that didn't end well - so I did them one at a time.  I'll try again using these videos.  I use her heel and its just awesome!  Her whole process is awesome.

So yes, I'm overloaded with a lot of first's and I couldn't be happier.  I'm also doing a design challenge and am having a blast with that.  My muse has been kicked awake.  I think I'll do my homework on my blog that way I can think out loud while talking to you.  It really does help!  With all that's been going on, I've not put many stitches on the needles expect for my blanket.  I am happy to be working on that again :)

Well I've homework to do for my design challenge.  Off I go!

10 January 2017

Yarn Haul - Dyeing

Oh the joys of Instagram - I used to think it was a waste of time, but I am having a blast on it with being able to follow my vape stuff and even better yet - get overdosed on knitting goodstuffs - including giveaways.  It was one such giveaway that I entered where one of the prizes is a sock blank.  I've never heard of that before - so off to Google I go.  I think these are the best thing since sliced bread!
Sock Blanks are pre-knit tubes of undyed sock yarn. You dye the pre-knit tube with the stripes that you want, then knit your socks directly off the tube. Somehow this seems like cheating, but in a good way.” - Yarn Scoop.
Neat eh?  But what is happening is that indie dyers are dying them or painting them with various designs and you can get them in 1 or 2 strand blanks.  1 strand is one 'sock' at a time and 2 strand is 2 socks at a time where they are likely to be identical. I started to dig a big further and saw where some people are making their own blanks at home on crank looms or knitting machines, and then dyeing them.  Oh the ideas that are skittering through my brain!

I've been very successful with dyeing my own fabric for my quilts - I've done discharge dyeing where you remove or lighten the colour with "bleach"; I've had the most fun with resist dyeing where you use wax to block off parts of your fabric, then dye or paint, then remove the wax.  

I don't think it'll be to much of a step for me to dye yarn.  Granted I won't be resist dyeing as wool definitely is NOT the same as cotton; altho on a sock blank it could work.  I have a lot of the supplies on hand already from my fabric dyeing.  I've been watching a lot of videos on how to do it.

I grabbed a two skeins of a yarn that is 50% superwash Merino wool, 25% rayon from bamboo and 25% nylon.  I did some research on whether the bamboo is considered natural or not.  If this company used chemicals to remove the bamboo it is considered to be not natural opposed to the process that spins it down.  But rayon is considered a cellulose fibre and that 'should' work well with my current dyes and paints.  As for the nylon part of it, that will likely be lighter in colour as the polys do not hold this dye well at all.  Which is actually okay because I do prefer tonal yarns - less stripy.  There are a several ways  can do this; paint on the dye or  paint, do a pot dye; or even use a mason jar.  I'm going to have to do some more research, but the dye bath or pot dye is likely to be the best choice.

At the end of December Knitpicks had a sale that had me drooling LOL  I got a haul and a half considering what I spent.  When I ordered they had a promo where if you spent $50 you were eligible for free shipping and a free tote.  I was hard pressed to reach that level, but I did

I grabbed 3 different yarns to use; Hawthorne Kettle Dyed yarn (2 hanks), Chroma (2 skeins) and at the bottom corner is what they refer to as Alpaca Cloud Fingering yarn.  Wow, but it seems so light and airy - almost like I'd be knitting with cobwebs!  If there's enough I might put that to a shawl instead of socks, it seems that delicate!  FINALLY got my needle gauge for US sized 000, 00, 0 and 1 needles.  *knitterhappydance*  To reach my free tote bag - I added Sock it to Me and locking stitch markers :)  I think what I've got is going to keep my busy for a while now.  I can't wait to get into the Hawthorne skeins - those have such a solid hefty feel to them!


I finally won my first contest on Instagram.  This company is based in the UK - It was shipped to my cousin who lives there and he's already gotten it.  It'll be on its way to me soon :)  Once I get my prize in, I"ll post a pic and share it with you.  The package included a set of Hiyahiya bamboo needles, a skein of yarn, Hiyahiya stitch markers, kitty snips, tape measure and a pattern that I've no idea what it is :)  oooohhhh I'm so excited!!

Ravelry - gquilts projects
Instagram - g.quilts

06 August 2008

Discharge Dyeing

Click on images to see enlarged version in a new window


Finally I got a chance to play with discharging fabrics - I've been seriously itching to do this and read a few sources (Quilting Arts Magazine & Fabric Art Workshop) as well as asking a ton of questions on Abstract Challenge Group and to my Dad.
Discharge dyeing is the method were you remove dye (colour) from fabric with bleach (or other various chemicals) - this can be done on several types of materials - but silk has it's own process to follow as bleach will eat away and ruin the silk. I opted to do simple bleach bath discharging.

In the June / July issue there was an article by Rose Hughes on how to do this, she recommended using a 1:5 solution of bleach to water - as well as 2 water baths for rinsing the bleach. In the magazine article she showed folding and pleating the fabric then wrapping it with string to prepare for it's bleach bath. In Fabric Art Workshop, the author showed another way to wrap up the fabric (altho this was for resistance painting) that I wanted to try as well. This method involved laying a string on dampened fabric diagonally, then folding it over; you then spun it around (remember snapping your friends with wet towels??) and pushed the twisted fabric to the middle and then tied the string together - this resembled a scrunchie when it was finished. So I took 3 pieces of fabric and had 2 different methods for binding up my little fabric rolls.

I found Quilting Arts to be over my head a bit when I first picked up the issue - and I still feel this way. What the author said was to put the fabric into your bleach solution and then to watch for colour change .. what she didn't mention is that the colour change would happen UNDER the strings (!?!) ... So here I am waiting for colour change that I couldn't see **groan**. One piece I pulled out in under 4 minutes or so because it looked like it was white - well it wasn't - I was seeing the backside of the fabric. So the one piece was underdeveloped as it were - and the rest were a bit overdeveloped. I got some unexpected and very cool results.

This piece here was done with the diagonal scrunchie method. This fabric was dampened first. You can see that this is one of the over developed pieces, but the results are very cool looking .. I still have some very usable parts on this - the larger white area was where the string had been directly touching the material. The other splotched areas are the inside parts of the scrunchie .. there was no colour change showing on this on the outside parts that were easily seen .. it wasn't until I pulled the fabric away that I saw the colour change ..

This is the other half of the same fabric - this was the fold and pleat method that turned this into a sausage shape .. for this one tho I started my folding and pleating in the corner and went diagonally instead of straight across .. you can see where the colour discharged under the strings .. again I saw no change on this until after I moved the strings. This material was not dampened before rolling.

This was the second piece of fabric. I wish I had taken a picture of the FQ before I rolled this one - this was the second piece that I did the scrunchie method on and the first one I pulled out under 4 minutes in. You can see that the purple really faded in spots, while it turned reddish in others .. this was a really deep dark purple piece. Again, dampened before folding. I'm not sure I like this at all .. got rather different results with the same method - I'm thnking that solid colours would be best, but thought this would be really neat looking with the pattern.

This was another fold n pleat method - you can see where the fabric is the really dark deep purple as I mentioned above .. but still more red than it was .. this was to long in the bath as well as the 2 blue ones were - I sort of like it, but am not sure on it - I didn't really want a blue piece :S I am rather disappointed in this one .. it was to long in the bath and I didn't get the results I was hoping for.

This one was the most disappointing of all .. there is no change what so ever in this fabric .. I'm not entirely sure why .. I'm suspecting that this material wasn't washed, but am thinking that bleach should have done "something" to it .. even it it lightened it a bit .. but no change at all .. another unexpected result - and this one was left in the longest.

I'm not entirely sure of the amount of time that these were floating around, but it was under 15 minutes .. when I do this next, I'll be sure to time it amd check UNDER the strings at 4 minute intervals me thinks

I did have fun with this and as usual I learned a LOT ... I'm glad that I didn't end up using the light pink I was thinking of - that would have ended up pure white ... I am disappointed in my purple, I was rather hoping for more dramatic results as it started out as such a deep colour .. but again, they floated to long ..

So word to new people wanting to try this .. look UNDER the bloody strings :S